Make a Battery From Salt and Water
Not a lot of people know this, but you can actually power devices from little more than salt, water, steel and copper. Learning how to harness your own energy can provide you with exceptional options if you are ever facing a SHTF situation, and this is one trick that you should invest in developing. The good news is that once you have this type of battery system in place, you can use it to run things like radios or light bulbs. The bad news is that a salt water battery is not all that portable. However, if you are bugging in or faced with a prolonged power outage, this is one option that may end up saving the day.
Understanding the Basics
You will need salt, water, containers (cups, cans or buckets), insulated copper wire, pieces of copper a minimum of two inches square in size, galvanized steel or common sheet metal and metal alligator clips for terminal leads. When you place the metal and copper in salt water, it creates a chemical reaction that generates electricity. The energy then travels along the wires, through the leads and into your device.
It is important to note that the total volume of water along with the size of the copper pieces will dictate the amount of power that can be generated. If you have a large container, such as a bucket, with a large piece of copper, you can generate upwards of 12 volts of energy. This process is also cumulative, so you can have 10 coffee cups filled with salt water along with smaller copper pieces that can generate just as much energy.
It’s also important to avoid over-powering your devices and frying out their electronic components. But, you can power a device with less and it will still work, albeit to a lesser extent. So, make sure that you didn’t create a huge water vat with a large piece of copper that produces 20 volts of energy, otherwise you can blow out your 12 volt devices. You can determine the appropriate ratio to water volume and copper through some trial and error, but one or two glasses will be powerful enough to light a small LED bulb.
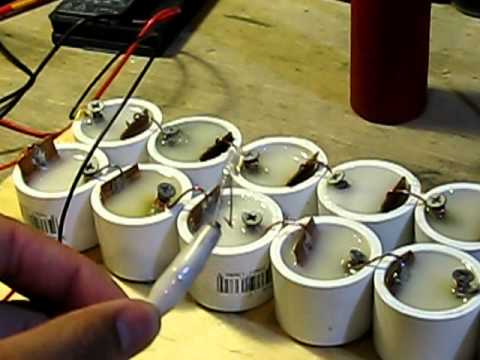
Setting Up the Battery
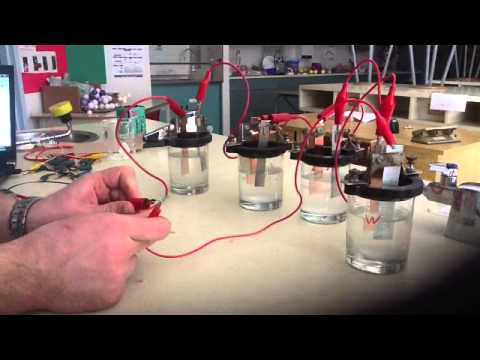
Getting set up is a lot easier than it looks, especially when you see all of the wires that come out of the finished product. All you need to do is poke a hole in the copper sheet, wrap an exposed part of the insulated wire through it, and make sure that the connection is secure. Repeat the same process with a wire connecting to the piece of sheet metal. Then, you place both wires and metals into the water on opposite sides. If you are connecting more than one container together in order to draw more power, Just take wire and connect both pieces of copper together, and do the same with the other wire and metal. As long as each unit is linked up, the magnified current will pass through and out to the ultimate end of the wires.
Attach the alligator leads to the end of the wires that will be connected to the item that requires power, one lead for each side of the connector or receiving wire. That’s it. You now have a battery system that can provide power during an emergency. Just keep in mind that this is a backup solution that will produce a limited amount of energy. However, having this set up may help you out in a pinch when other options fail.

Click Here to Watch the Video