Safe, Easy and Effect Wound Stapling
Stapling a laceration is an excellent option to consider instead of stitching because it is faster, easier and can be accomplished with little practice or training. However, it is important to follow some basic guidelines in order to ensure that the wound is adequately closed while minimizing the chances of infection. Let’s take a look at an easy way to practice and develop an important skill that may come in handy at some point during a crisis.
Practice makes perfect, and it is important to have some hands-on experience before attempting to apply staples to a real patient. The most universally-excepted method is to take a large pig’s foot or portion of the body that still has the skin attached. Make sure that it is raw and fresh, not frozen. Pig has a similar texture and consistency to their human counterparts, and these similarities help the practitioner to get a good sense of what to expect when treating a patient in the field. Cut an incision through the skin that is at least a few inches long in order to give yourself some ample space to practice.
Preparing the Wound
The first step is to wear sterile gloves and protect the wound site by placing some surgical drape on top of the area. This may not seem like a big deal, but the drape actually provides a fantastic barrier to infection by minimizing the ability for the wound site to become contaminated. You can either drape the area before or after you apply antiseptic, but the important thing is that you create a hole in the material that is slightly larger than the wound.
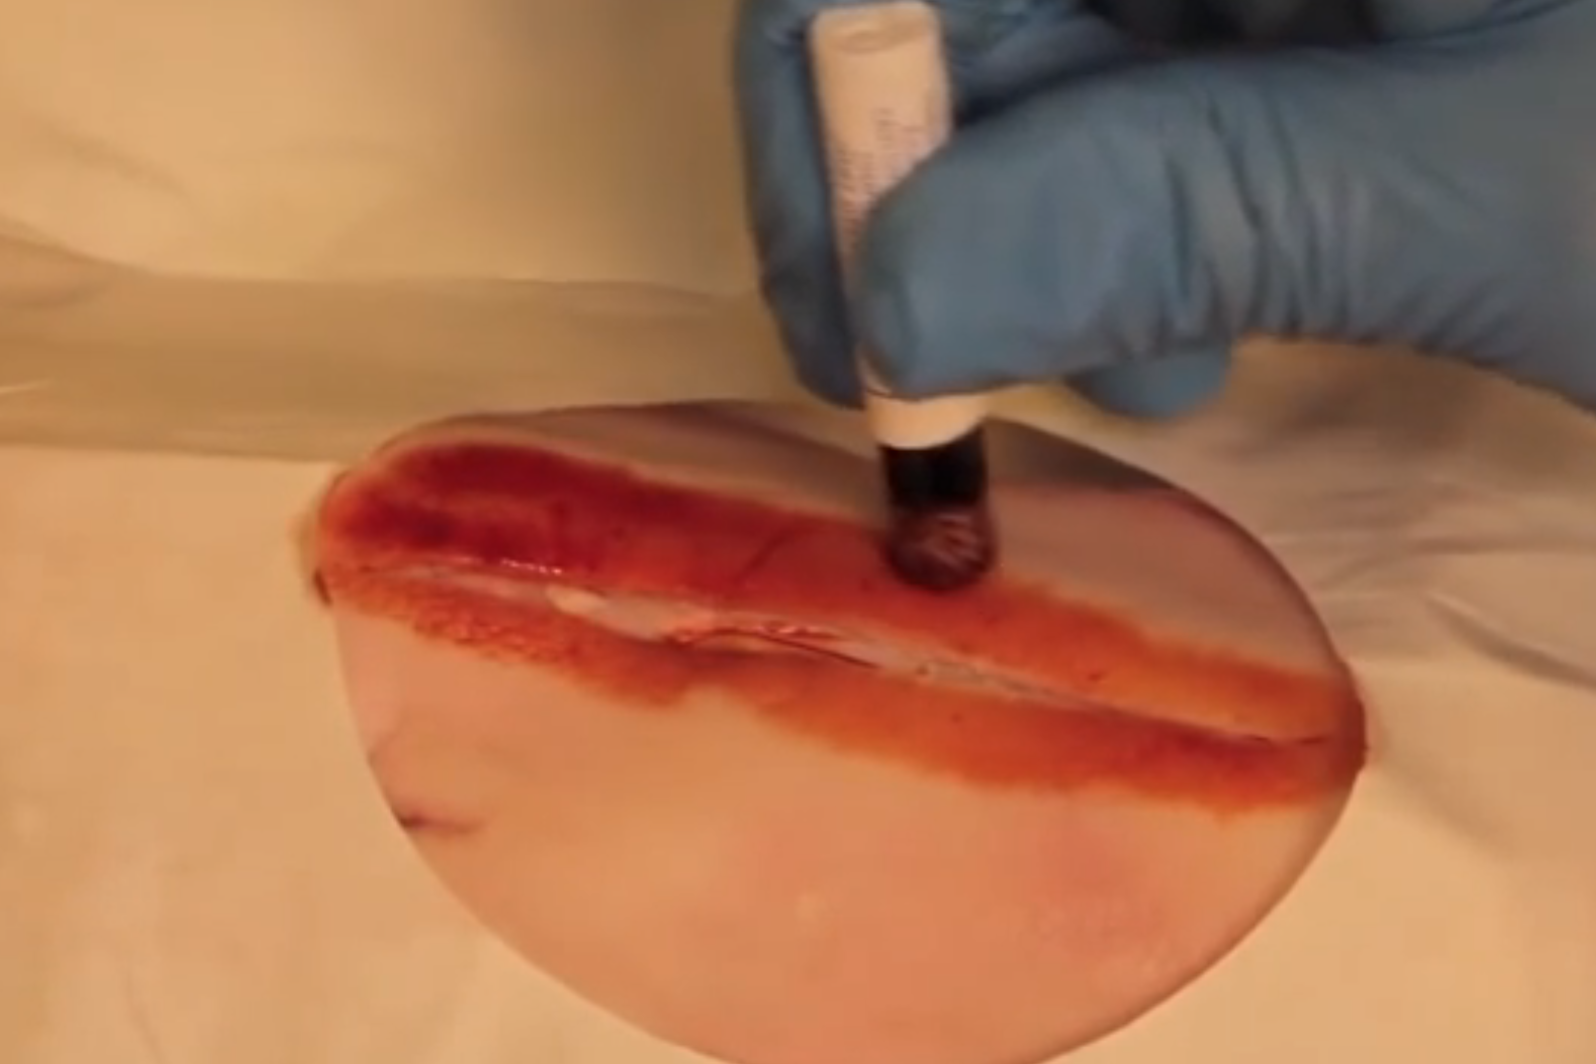
The next step is to treat the area immediately next to the wound with an iodine solution. This can be found in almost any pharmacy, and you can either purchase a bottle or use individual tubes that have a soft-tipped applicator. If you use a bottle, you want to apply the iodine with a sterile cotton swab starting from the edge of the wound and work your way outward for an inch or two. If you use a single-use applicator, you usually need to squeeze the plastic or glass to release the iodine and then let it fill the soft pad on the top. Gently trace the solution around the wound, but be careful not to apply the iodine to the same area twice. This will help to reduce the chances of infection while also reducing the chances of running out of solution before covering the affected area.

Stapling the Wound
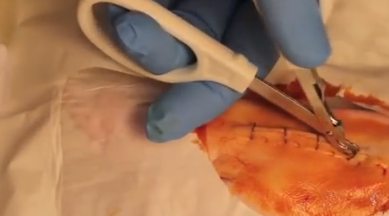
You will need a medical stapler as well as two rat-toothed forceps. You could always improvise by using tweezers, but the forceps will allow you to grip the skin and hold it together more effectively. This will reduce the amount of pain and discomfort that the patient will feel, reducing the chances of slippage, and it will speed up the overall process.
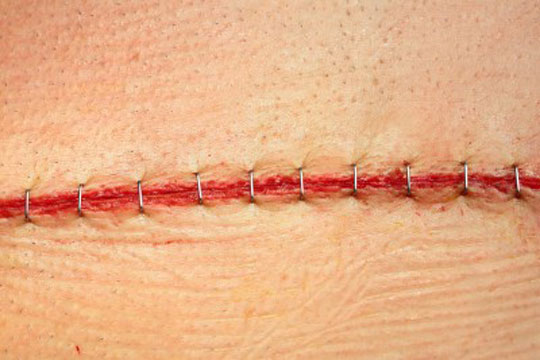
You will need an assistant during this procedure because holding the skin requires two hands, and you also need to be able to apply the staples. You want to start from one end of the wound and work your way up or down, evenly placing staples about ¼ inch apart. The basic idea is to take the forceps and gently pull and turn out the skin at the edge of the wound so that you invert the edge. You want to repeat the process with the other forceps and bring the two sides together.
Once the skin has been pulled and held together by the forceps, you can apply the first staple. You will notice that a seam is created just above where the skin is being held by the forceps. You want to place the stapler gently over the seam and press. You don’t need a lot of downward force to secure the staple in place, and you want to make sure that you have a good grip on the stapler to prevent it from slipping and banging into the wound. Repeat the process until the entire wound has been stapled.
Apply some more iodine to the wound and remove the drape. Apply some antibiotic ointment to the underside of a gauze pad or large bandage and place over the wound after most of the iodine has dried. Seal with some additional gauze or tape as needed. Change the dressing every day and keep the affected area dry. The staples can be removed once the the wound has healed to the point where it will not tear open again. This will usually be between 10 days and two weeks.
Removing the staples is a very easy process, and you can do it without any assistance. The first step is to remove the dressing and rinse the area. Take the staple remover and gently insert the bottom tooth beneath the center of the staple. Hold the remover above the wound so the top tooth is resting above the bottom one. Press and the staple should buckle in the middle and come out with little or no resistance. Clean the affected area after the staples have been removed and apply new dressing if needed.
This procedure is very easy, and it will only take a couple of practice rounds before you get the hang of things. Make sure to use quality pig flesh and skin, and only use a medical stapler and remover. These items are not that expensive, and they are designed to be efficient which will minimize patient discomfort.
