Making beef jerky is not a difficult process, and you can create batch after batch simply by using your oven. All you need is to follow the steps outlined below and make sure that the meat has been carefully prepared before hand. You can also make different variations to this recipe and create an efficient and tasty way to store and consume meat if you are ever in a SHTF scenario.

Preparing the Beef
The first step is to choose the right cut of meat. For jerky, try to stay from the expensive and succulent pieces of meat that have a lot of tenderness and flavor. They may actually produce a poor quality product once the process is complete. One of the best cuts to use for jerky is brisket or shoulder as their stringiness will make consuming the jerky easier and more enjoyable.
There are also no hard and fast rules with respect to the size of the cut of meat to use or how long each strip should be. Just make sure that you have enough space in the oven to accommodate the meat as it is curing. You will also need to have enough space to store the finished product. You can also section off larger pieces into smaller chunks as well.
The next step is to trim off the fat from the top of the meat. Make sure to remove as much as possible without gouging the meat. You can usually peel away the top layer after you made an initial cut, and you may need to dig out remaining pieces of fat and grizzle that have embedded themselves in the top of the meat. Don’t worry about fat that is trapped inside the fibers of the meat, rather the thick slab that rests on top of the cut.
Cutting the Meat
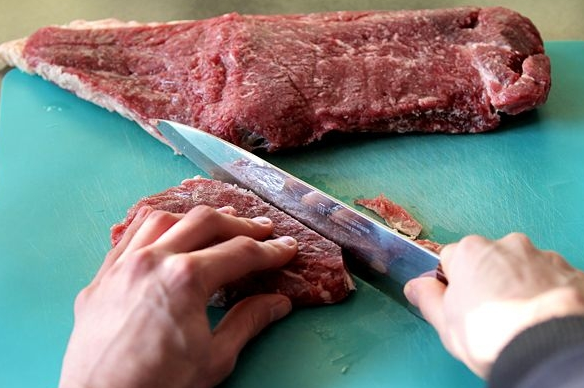
The next step is to freeze the meat if possible for a few hours. Place it in a freezer bag or wrap it in freezer paper and tape closed. This will firm up the meat and make it much easier to cut into thin strips. However, you can cut the meat as soon as the fat is trimmed, but it will be difficult to create uniform strips that will cook evenly.
To cut the strips, make thin cuts, no thicker than ¼ inch that go against the grain of the meat. Place the meat on the cutting board with the grain, or strips of fat facing from left to right. Make the cuts up and down. Cutting with the grain will produce chewy, stringy jerky that is difficult to consume. It will also produce fibrous pieces that can easily get stuck between teeth along with having a tough consistency. Cutting against the grain will produce meat that breaks off in the mouth and is easier and more enjoyable to consume.
Seasoning and Cooking
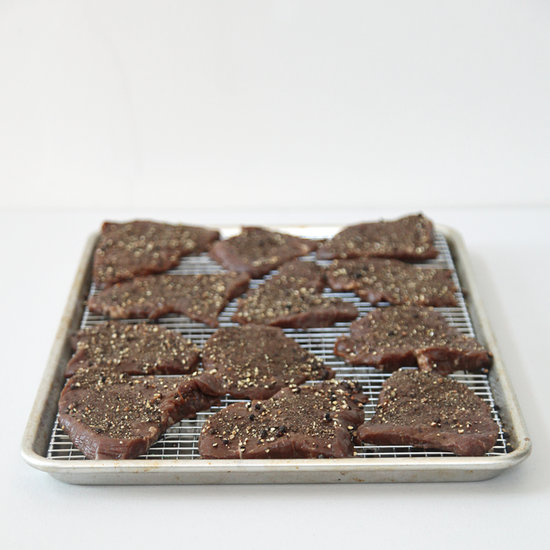
The next step is to season the meat or choose a marinade. You should minimally season with salt and pepper, but you can add your own flavors based on your preferences. You can also marinade with flavors or sauces of your choosing. However, make sure that you mix it with two parts of water for every part sauce. This will make applying the marinade easier and allow the juices to soak through the meat.
Finally, place the strips on a wire oven rack, cover the bottom of the oven with foil to catch drippings, set to the lowest possible temperature setting (between 140-170 degrees) and bake for anywhere between 4 and 6 hours. Actual cook times will vary depending on temperature, altitude and the thickness and quality of the meat.
You will know the meat is done when it can bend and tear without dripping or feeling spongy. You want it to be dry but not bone-dry. Pieces should easily rip off by pulling them with your fingers, but there should be no juices or uncooked color to the strips. Continue cooking if the meat appears undone and check every half hour until the batch is finished. Turn off the oven, open the door and allow the heat to escape. Close the door and let the meat rest overnight in the oven before storing and packaging.
You can use this method for almost any kind of meat, and it makes the perfect way to store turkey and small game as well. Try it out for yourself and see how easy it is to create, store and consume this time-honored source of nourishment when traditional methods are not available.