Pine pitch is a type of glue that you can make with little more than some sap from a pine tree, charcoal and fire. It is a strong and durable sealant that can be used for a number of applications, and it only takes minutes to make. It also works on almost every type of pine or coniferous tree, and this means that the raw materials for this fantastic sealant are available almost everywhere. Learning this little trick can prove to be an invaluable resource during any survival or SHTF scenario.

Gathering the Sap
The product you make will involve approximately equal parts of sap and charcoal, so the amount of material that you need to gather will depend on your needs at the time. The good news is that once you prepare the sap, it can be stored for future use, so you can’t make too much ahead of time. What you are looking for are wads or balls of sappy deposits along the bark of pine trees. However, if you can’t find them, you can also use sap streams that flow from cracks and crevices in the bark as well.
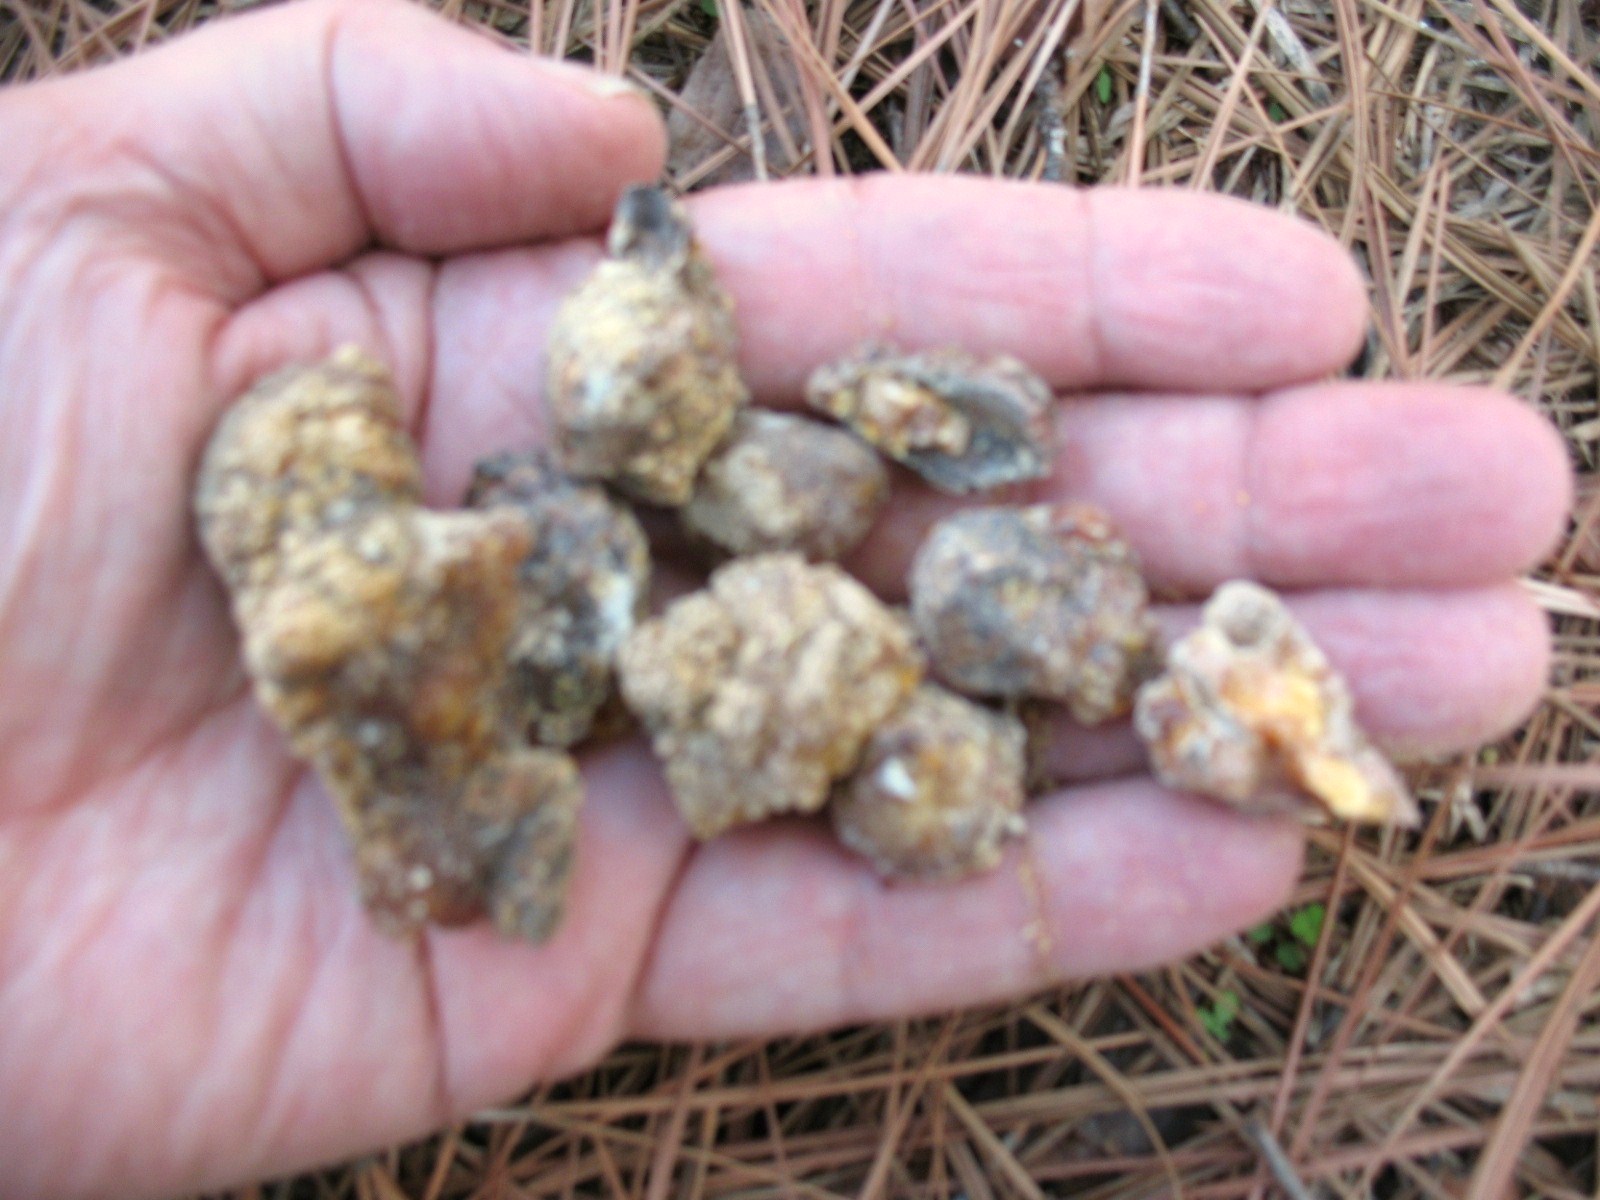
Don’t use your survival knife to dig out any of the sap due to its sticky and hard to remove properties. It’s better to use a stick to pry, gouge and collect the sap and then put it into a container. A handful is probably more than enough to make at least two wads of pitch by the time all is said and done. It also doesn’t really matter what kind of pine tree you get the sap from. Some people say that different trees produce different types of sap, but all of them will have the gluing quality that you are looking for.
Remove any loose-clinging fragments of sticks, pieces of bark or other material from the sap as you go.
Preparing the Glue
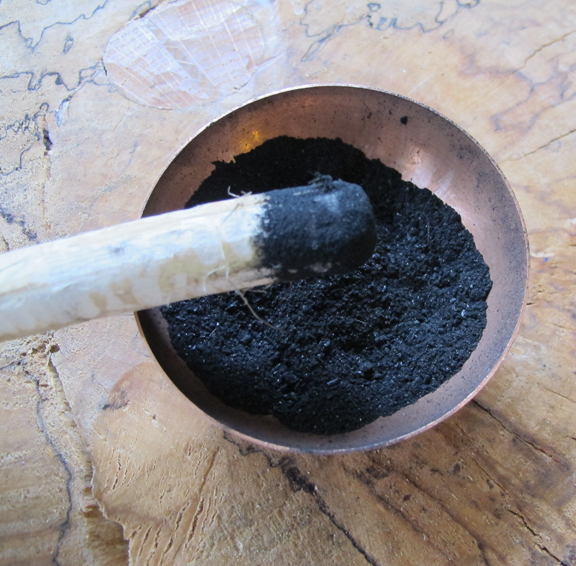
Take the charcoal and use a mortar and pestle to grind it down into a fine powder. You can use charcoal from the bag or from your fire as long as it is black and sooty. Set the powder aside until you add it to the sap. Prepare a fire or heat source that you can use to melt down the sap. You will need a grill or some way to hold the container of sap above the heat until it melts down. Take a stick or two and use them to poke and prod the sap as it softens, helping it to melt evenly. Remove any debris that may emerge as it melts.
Be very careful not to come into contact with the sap. It will not only be incredibly hot but also very sticky. You can receive serious burns from the sap because it will be difficult to remove before it cools.

Once the sap has liquefied, remove it from the heat and set on a flat surface. You do not need to wait until the sap is boiling before taking it off of the flame. Some people believe that boiling sap will lead to a harder and more brittle glue later. This may or may not be true, but you may want to play it safe and remove it from the heat once it becomes a sticky liquid.
Carefully add the charcoal powder to the melted sap, working it in with a small twig until it is blended thoroughly. The result you are looking for is a black ball that looks like tar but has the consistency of play dough. The charcoal acts as a binding agent, and once it is mixed, the sap will no longer adhere to the skin. If the glue is too runny, add more charcoal. If the glue is too thick, add some more sap. You may need to play with proportions a few times until you get the blend just right.

Mold the glue onto the end of a stick so that it resembles the end of a cattail. The glue will harden as it cools, but it may not become completely solid in hot and humid weather conditions. All you need to do is light the mixture when you need some glue, and it will soften enough for you to be able to use it to fix a host of problems in the field. It will not be as strong as some epoxies that you find in home improvement stores, but it will be much more durable and effective than you may think.