Broken bones and sprains are par for the course in many survival situations, and injuries often occur at times when we don’t have proper equipment on hand to render appropriate first aid. However, you can fashion a rudimentary cast from mud that contains high levels of clay in a few easy steps. While it will not be a strong as a regular cast, it can provide enough support and protection until you are able to find more long-lasting solutions.
Here is a general outline of how to put this technique to work for you if the situation ever presents itself in the real world:
Protect the Limb
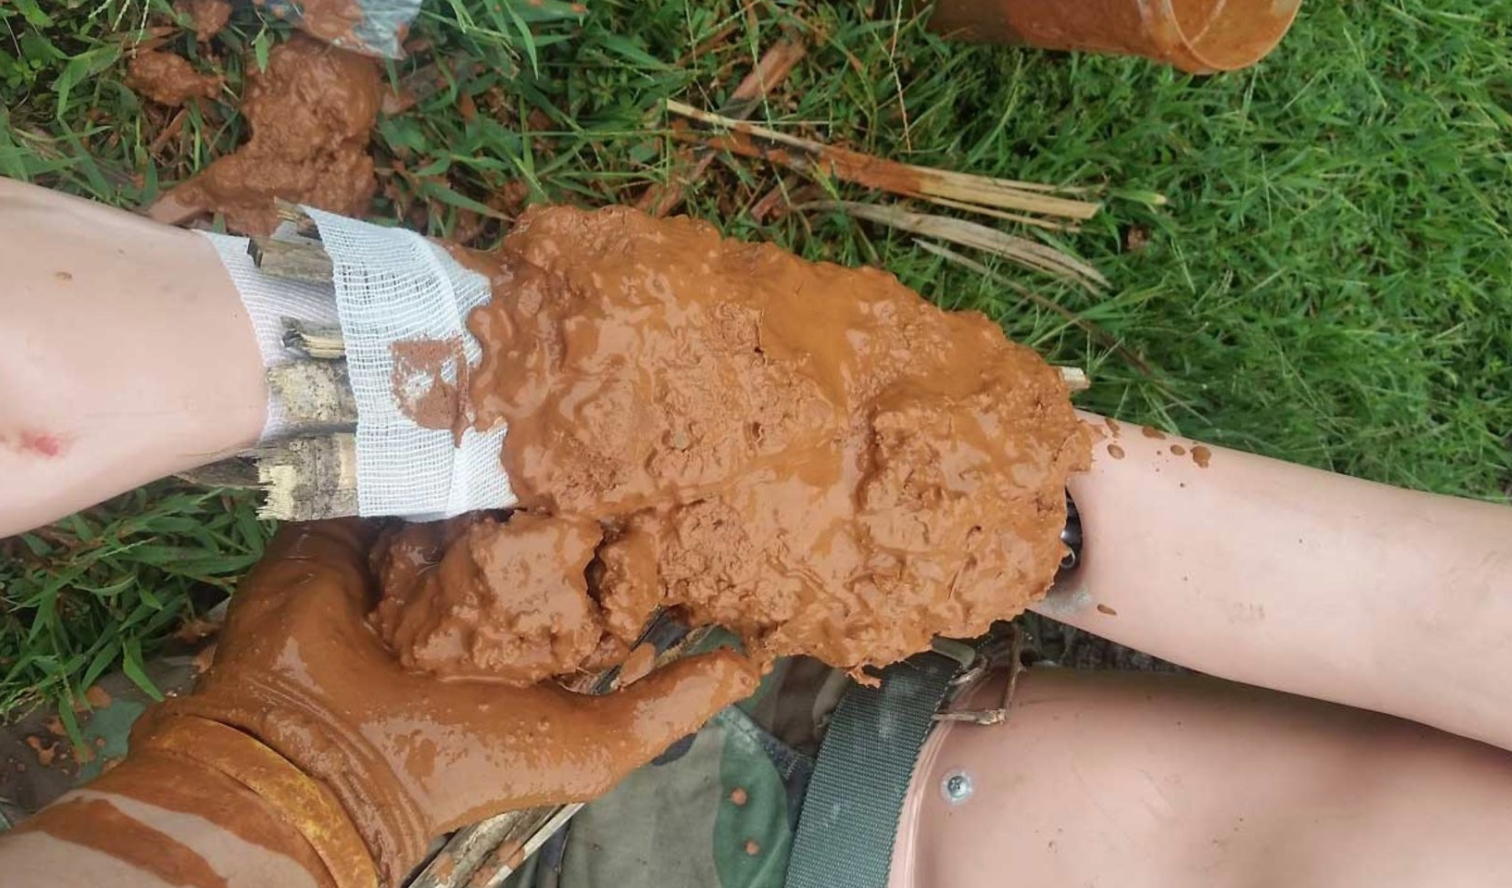
The first step is to wrap the limb with some gauze or strips of fabric, and make sure to wrap the entire area that will be covered by the cast. This will provide some basic padding and help to protect any open wounds from infection or further injury. Next, place two or three thin, smooth and flexible sticks along different sides of the length of the limb. This will provide some basic stability while also reinforcing the cast once it sets. Make sure that you position the limb properly before wrapping another layer of gauze or fabric over the sticks to secure them in place.
Making the Mud
All you need is some clay-based soil and water to make the mud. However, you can also add some small pieces of forest debris to the mix if the soil has low clay content. Try to make the mud as thick as possible by using a minimal amount of water, and remember that excessively-moist casts will take longer to dry and set.
Carefully add handfuls of mud to the limb at a time as you press it into place. Work in sections, and pack the mud so that it is evenly-pressed against the padding and sticks. Keep working around the limb until you achieve a nice, thick and symmetrical first coat. Let it dry, and add more mud as necessary to make the cast stronger.
It’s important to find the right balance between creating a cast that has a snug fit while making sure that it does not constrict blood flow around the affected area. Check extremities about 10 minutes after the cast hardens to make sure the patient isn’t experiencing signs of constriction that include discoloration, swelling, numbness or tingling. If this happens, you will need to break off the clay and start over in order to avoid causing further, potentially-devastating injuries.
Securing Everything in Place
Finally, consider adding an extra layer of fabric around the dried cast for some additional protection. This is particularly important if the victim will be traveling through less-than-ideal conditions where the cast can become damaged from bumping into things along the way. It’s also a good idea to make a sling for arm injuries and secure it to the torso to minimize movement.
Practice making these types of casts for arms and legs that are set in various positions, and try to use different soils when possible as well. This will give you a sense of what to do in a real emergency without having to go through a lot of trial and error at the time.