
You can build a small and effective metal detector in a matter of minutes with some very common and basic items. This could be an awesome tool to have at your disposal for a number of reasons, and it will cost you almost nothing to create. Take a look at the simple instructions below and start discovering treasure, finding lost items or using it to detect hazards that may be hidden beneath the surface.
What You Need
- Small AM/FM radio
- a battery powered calculator
- a CD case
- tape
- Velcro
- cardboard
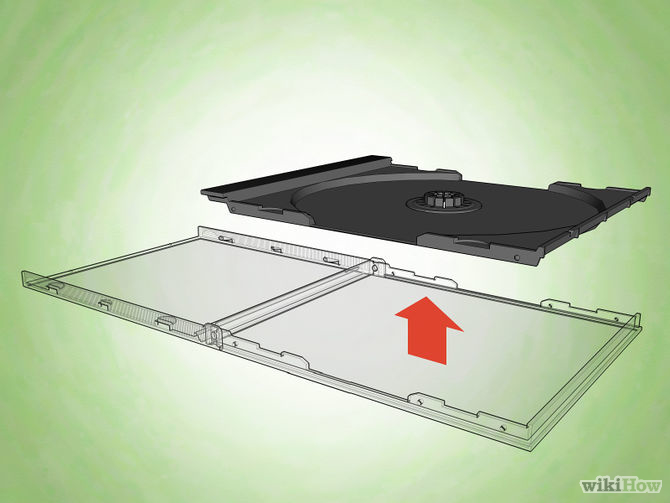
All you need to get started is a small AM/FM radio, a battery powered calculator, a CD case, some tape, Velcro and a piece of cardboard. The first step is to secure the back of the calculator and radio to the inside of the CD case on opposite sides. The Velcro will come in two sections. One will act as the base while the other will contain the fabric that secures everything together. Make sure to use Velcro that has some adhesive backing so they will be easy to attach. Place one piece on the back of the radio, and attach the other piece to center of one of the interior flaps of the CD case. Repeat the process on the other side for the calculator.

The idea is to be able to move both sides of the CD case and their respective components close together in a clam-shell fashion, with both of them facing the other. However, you don’t want them to touch because a gap will need to exist in order to maximize the effectiveness of the device. Turn on the radio and calculator and turn up the volume to the maximum level. Select the AM band and move the dial so that you tune into an empty frequency towards the high end of the spectrum.
As you close the CD case, you will notice that the radio will begin to pick up the signal that is being emitted from the calculator. The static will get louder or softer depending on the distance between the radio and calculator. Adjust the space between the flaps of the CD case until it produces the maximum signal. Secure that gap with a piece of cardboard and tape everything together.

You will notice a very distinctive sound as you pass the device near and over a metallic object. The sound comes from the metal interfering with the signal between the radio and calculator. This improvised device can detect any metallic object within a few inches to more than a foot away depending on the strength of the receiver on the radio.
You can also try a simpler version of the same principle by taping the backs of the radio and calculator directly together. However, the strength of the signal will probably be weaker with this method because there is no space between the devices and the plastic casing could shield the radio waves as well. If you put them together face to face, chances are that you will hear a high-pitched squeal from feedback instead of static, but this will vary from device to device.
Practice with each configuration and feel free to try different combinations of calculators and radios until you get the strongest signal. You can also experiment with different designs in order to make the detector more durable or to include a handle as long as you follow these basic principles. This is a great tool to have at your disposal, and you never know when it will come in handy out in the field.
