There are plenty of ways that you can make an alcohol stove from aluminum cans, and most of them will work pretty well. However, there one project worth knowing about that involves making one from two aluminum bottles instead. Not only is it very easy to put together, but the stove is surprisingly-efficient as well. Take a look at the following steps and see how you can make your own in just a few minutes.
Getting Started
All you need are two aluminum bottles, a sharpie, a ruler, a good pair of shears, a hacksaw and some fuel. You can use any fuel that you like, but alcohol works particularly well with this stove. The first step is to trace a ring with the sharpie about an inch from the top of the first bottle. Next, use a ruler to measure two inches below that mark before tracing a ring around this spot as well. Then, take the second bottle and mark a spot that’s 2 ¼ inches from the top and trace another ring. Measure, mark and trace another ring 1 ½ inches below this spot.
Once you have these four spots marked, you can start cutting. Use the shears to trim off the neck of each bottle if possible, because the pressure from the hacksaw can cause the aluminum to bend around this weak area. Set the necks aside. Then, take your hacksaw to cut around the lower lines below the necks. You can make all of these cuts rough and then trim them with the shears when finished.
Take the two sections that you now have and file, grind or scrape them against some abrasive concrete to remove any shards and smooth them out. They don’t have to be perfect, but you want to buff them down a little bit in order to reduce the risk of accidentally cutting yourself.
Next, take the piece that has the smaller neck and turn it upside down. Invert the other piece and place it inside of the first one. The neck will protrude through the hole, and this is what you will use as the base for your pot or cup that you are heating later. Try to make sure that it is as level as possible.
Finally, place the inverted set into a clamp or in the gap between two 2×4 boards so that the neck has a place to stick out while the sides are flat against the surface. Take another piece of wood and a hammer or mallet, and gently pound in the inner piece until both are fused together.
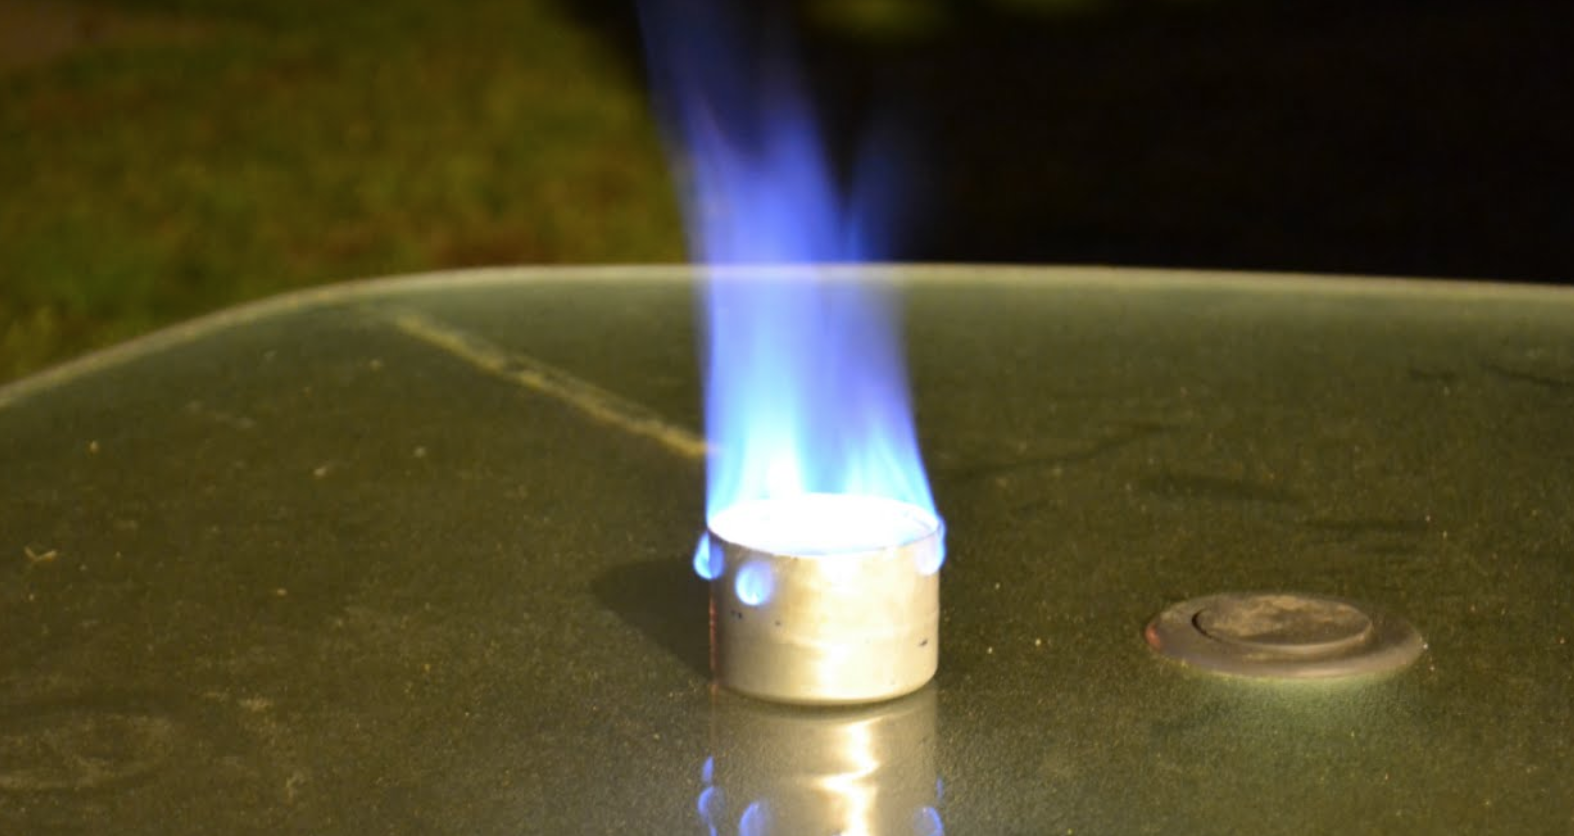
Using the Stove
Turn the stove right side up, and you now have a bowl with an inner ring and neck sticking up. Pour some water into the gap between the outer and inner sections to make sure that it doesn’t leak. If it leaks, hammer the pieces a little more until they are sealed.
When ready to use, pour the fuel into the gap, light it up, and you’re good to go. You may not be able to see flames at first, especially if you’re using alcohol, but you will feel heat as it starts to boil. Carefully place your pot or cup filled with water over the center section, cover it up, and you should have boiling water in about 5-7 minutes. Just be careful because the pot can be wobbly.
While this probably isn’t the best can stove out there, it is one of the easiest to make and use in a pinch. Try it for yourself, and see how this can be a nice addition to your survival bag of tricks.