The tripod is one of the easiest types of water harvesting and filtration devices to make. Its simplicity and effectiveness are two main reasons why everyone should know about this rudimentary method. However, it’s also far from perfect, and it represents more of a first line of defense against contamination as opposed to delivering a safe and clean finished product. Let’s take a closer look at some of the pros and cons associated with the tripod filter so that you can decide when it’s appropriate to use in the field.
Simple Design
One of the biggest advantages of this filter is that it’s easy to put together, it doesn’t require a lot of material, and it can be deployed almost anywhere. It can also catch and process a good amount of water at any given time.
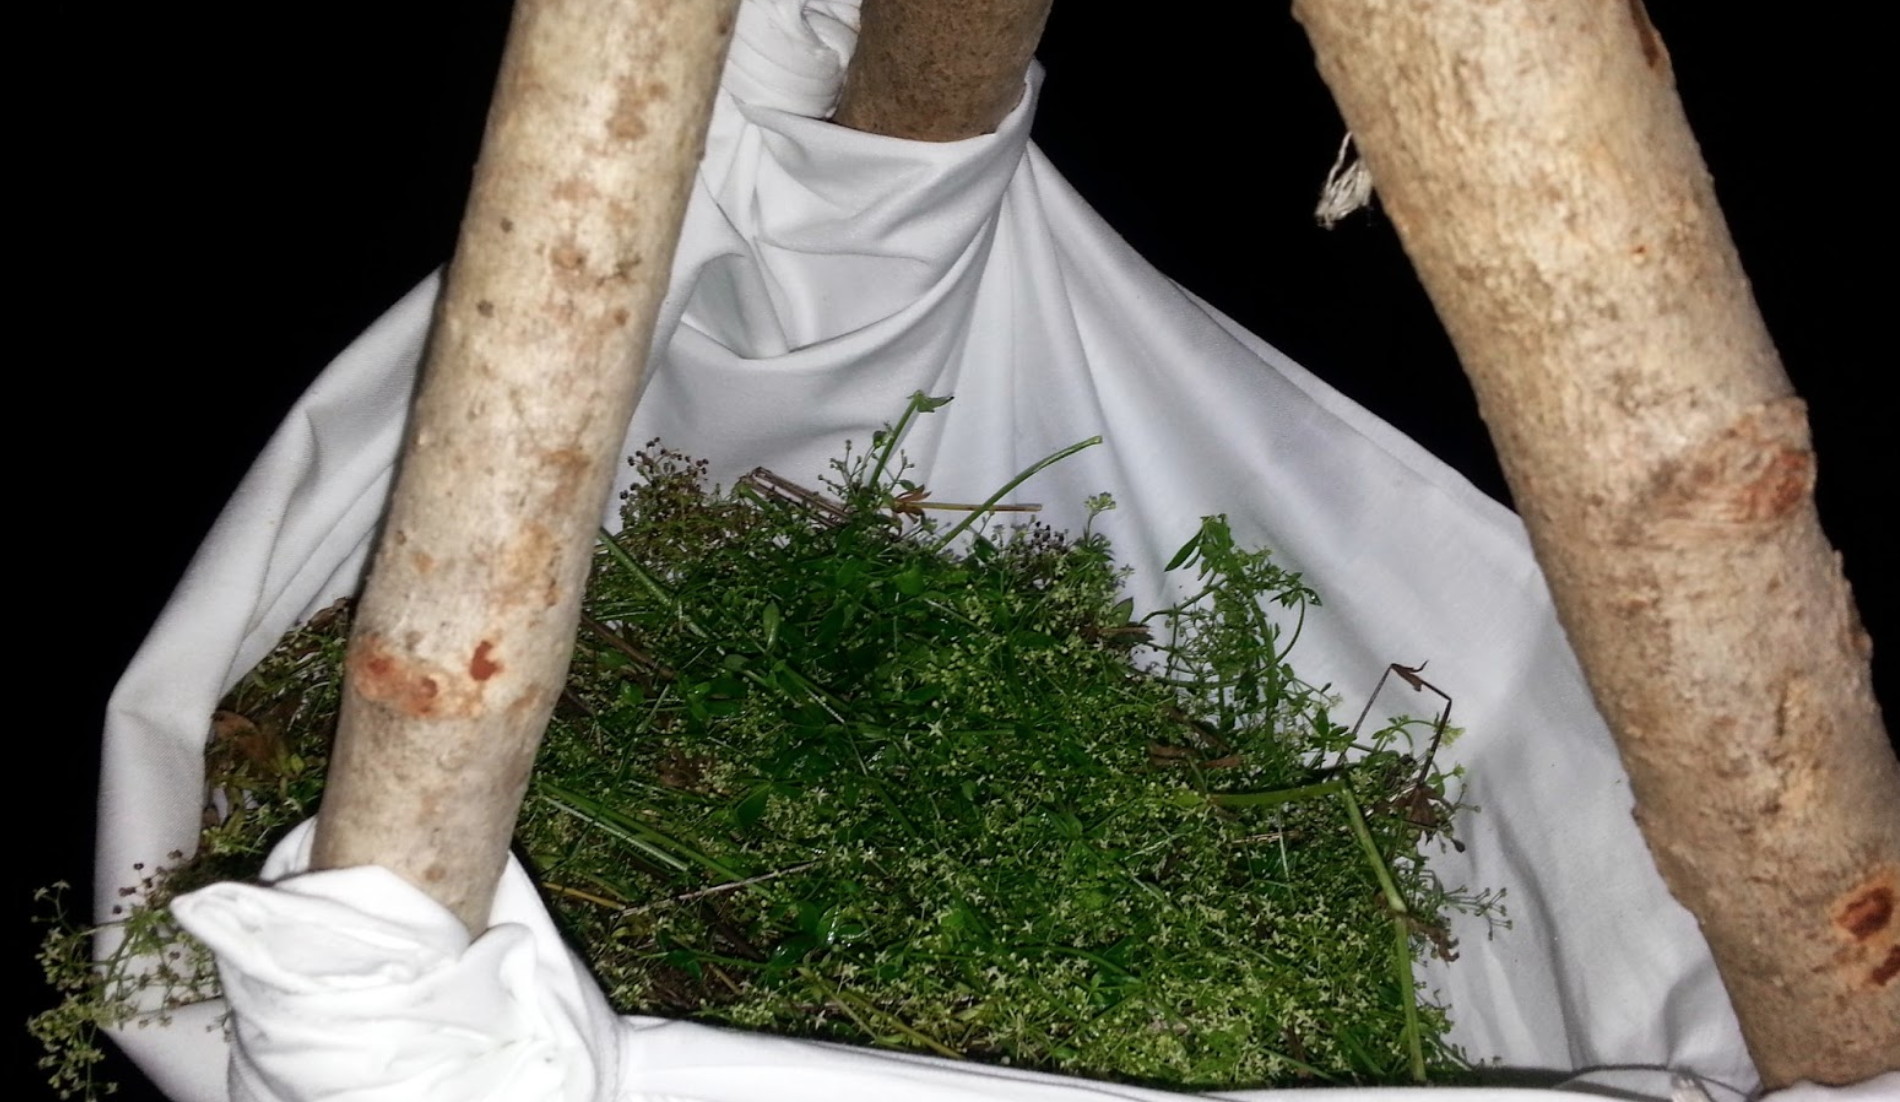
All you really need to build this system are 3 sturdy branches that are around 4 feet long, some form of cordage and 3 pieces of cloth. Set up the branches in tripod fashion and lash the tops together. You will end up placing a large piece on the bottom, a medium-sized one in the middle and a small one near the top.
Place a bushel of fresh-cut grass, hay, pieces of foliage or leaves into the center of the smallest cloth and fold it over in the shape of a triangle to hold the material in place. Next, attach each end of the cloth to a corresponding leg of the tripod, but make sure that you leave enough slack so the pouch can droop slightly in order to catch as much water as possible.
Next, attach the middle cloth to the tripod and allow for some extra slack as well. Place a couple of handfuls of charcoal from an extinguished fire in the center of the material. However, its important to make sure that you separate the charcoal from the ash, otherwise you’ll end up making lye instead of filtering water.
Finally, attach the largest piece of cloth near the bottom of the tripod and fill it with a few handfuls of sand. Pour a steady stream of water over the top cloth and let it trickle through the rest of the system until it drains out from the bottom. Keep running water through the filter until any cloudy, discolored or particle-laden water starts to disappear. It’s not uncommon for material to contain contaminants that need to be flushed for a couple of minutes after you’ve set up the filter for the first time.
Once the water is running clear, simply place a container beneath where the water drips out. Now, you can continue to process the water according to how it will be used. You can boil it or add purification tablets to kill off pathogens and microorganisms, or you can use it for things like rinsing, cleaning or irrigation without further purification in most cases.
Final Thoughts
Remember that this unit is not intended to be a complete, all-in-one filtration system. You will need to take further steps to remove possible contaminants if you will be drinking this water. However, it can be used as a great first-step to improve the quality of the source water that you’re collecting.
Try it for yourself, and see how this rudimentary system can come in handy in the field when other options may not be available. It’s portable, lightweight and surprisingly durable, and chances are that you’ll be surprised at how much water you can collect.
