There is a lot of debate over using an oven instead of a water bath or pressure canner. Government guidelines recommend not using this method whereas many people who have a lot of experience with canning don’t see a problem. One thing that is certain is by canning dry goods, you can avoid a host of potential problems that are associated with keeping sacks in dry storage over the long term. A few examples include mold, insect infestation or rodent problems. Let’s take a look at a method that may or may not be worth trying out in order to better preserve things such as flour, wheat, rice or masa.
Getting Started
The trick to using an oven for canning is to maintain temperature control. This is probably why the government doesn’t recommend this method as oven temperature readings may not be all that accurate. However, if you have a good thermometer and reliable oven, chances are that temperature fluctuations will not be much of a problem. When using the oven, you want to maintain a temperature of 225 degrees for one hour. It’s okay if the temperature goes up slightly, but you don’t want it to go down. Otherwise, the product may not be properly processed, and the jars may not completely seal once they cool down.
Processing the Dry Goods
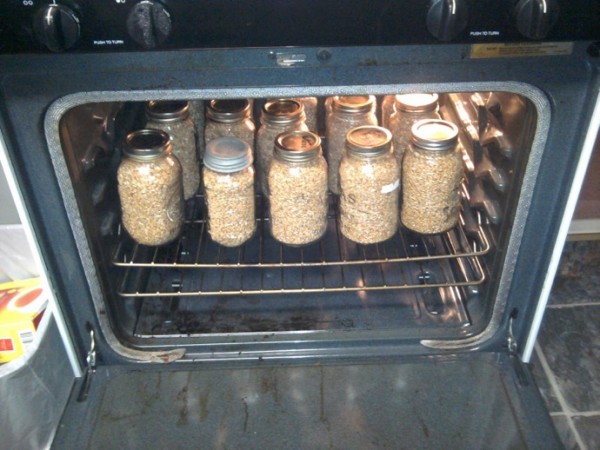
The first step is to make sure that you are using sterilized and completely dry mason jars. You also want to preheat the oven so that it will be ready as soon as you fill the jars. Fill the jars up with the dry goods that you want to process until about ½ – 1 inch of headspace remains. Do not put the lids on the jars. Place the jars on a baking sheet and put in the oven for one hour. Remember that the magic temperature is 200 degrees, and it’s important to continually monitor it as the cans bake. If the temperature drops, you will need to extend the processing time accordingly.
While the jars are heating, take your lid assemblies and heat them in water. You do not want to place cold assemblies onto the hot jars, otherwise they can cause the jars to crack. You also don’t want to attach the lid assemblies on the jars before baking because the moisture from the hot water causes the lids to expand, so it’s an important part of this process.
Sealing and Storing the Jars
Once it’s time to remove the jars from the oven, remove the lid assemblies from the water and dry them completely. This is where the process becomes part art as much as science. The trick is to get them completely dry before attaching them, but not before they cool down. You need to work quickly but thoroughly. You never, ever want to put moist lids on the jars, otherwise you run the risk of tainting the product during storage.
Remove the jars from the oven, wipe the rims with a hot, damp cloth, and attach the lid assemblies. Be careful because the jars will be very hot. Once the lids are securely attached, place the jars on the counter and let them cool to room temperature. The cooling process will create the vacuum seal that we’re trying to achieve with this method. Once the jars have cooled, check the lids to see if they are sealed properly. If they are sealed properly, simply label and date the product before storing it in a cool and dark place. If they are not sealed properly, process again using different jars/lid assemblies.
While this method may not be for everyone, it can provide an excellent opportunity to create a backup supply of dry goods. You never know when bags or sacks can become torn, infested or compromised, and using jars as an alternative can provide you with some additional security.