How to Make a Rudimentary Knife Using a Razor Blade
All you need is a small piece of wood, such as a branch or a broom handle, a razor blade and some basic items to make a handy and practical emergency knife. It will be pretty rudimentary, but also something that can be valuable in the field when you don’t have any other options available. This project is also very easy to put together.
![]()
Required Items
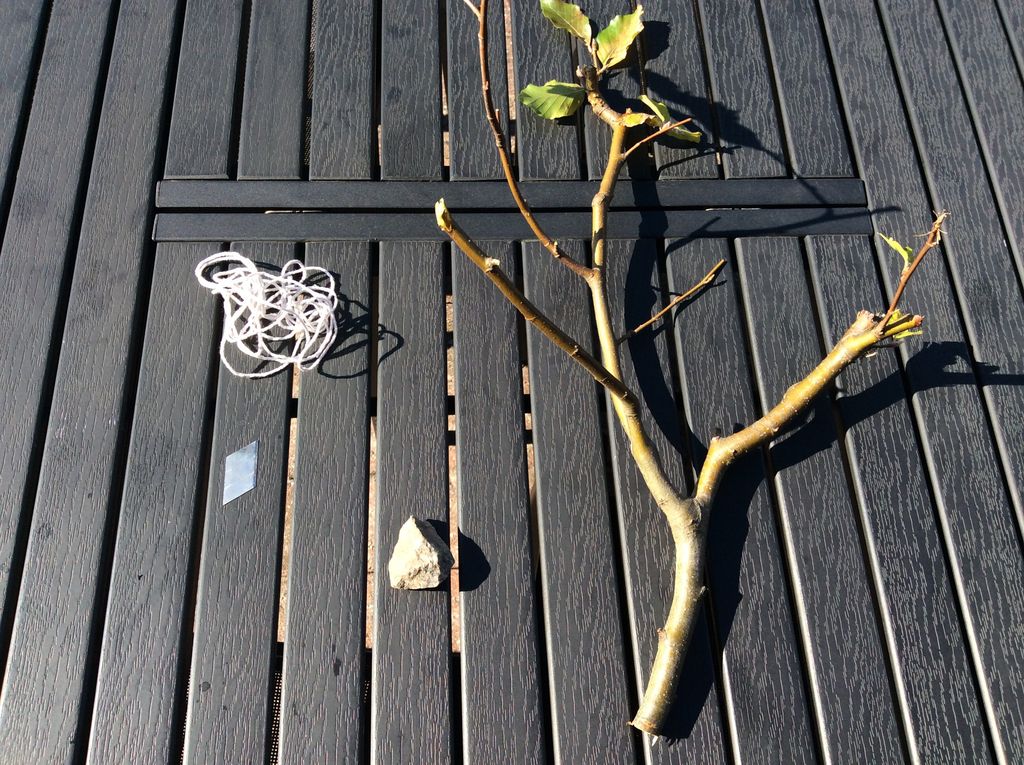
Shaving razor blade with holes on top
Wooden stick or dowel around ½ inch diameter
Some small gauge wire or cordage
Gloves and protective eyewear
Pliers
Knife or box cutter
![]()
Getting Started
The first step is to choose the right piece of wood to serve as the handle. It needs to be in good condition in order to withstand the forces of cutting, and it also needs to fit comfortably in the hand. A dowel or broom handle is almost ideal since it’s already smooth. Make sure to remove and buff down any protrusions from sticks that you choose to use. You can also cover the surface with some duct tape in order to add some padding and protect your hands while using the knife as well.
In any case, aim for a piece that’s about 7-8 inches long in order to provide good balance and adequate leverage.
Next, you need to prepare the blade. Most razor blades that go into refillable ones have holes in them, and they are the easiest to use for this project. However, you can also use the blades from disposable razors as well. Most of them also have holes that are used to anchor them into the plastic frame. If you are going to be disassembling plastic razors, make sure that you are wearing gloves and protective eyewear in order to avoid getting injured if something goes wrong.
To remove the blade from the plastic, take the pliers and crack the frame until it breaks. You may also be able to take a small blade, such as from a box cutter or pocket knife and use it as a wedge to break the plastic apart. In any case, you should be able to pull it apart after a little prying or cracking in order to remove the blades.
![]()
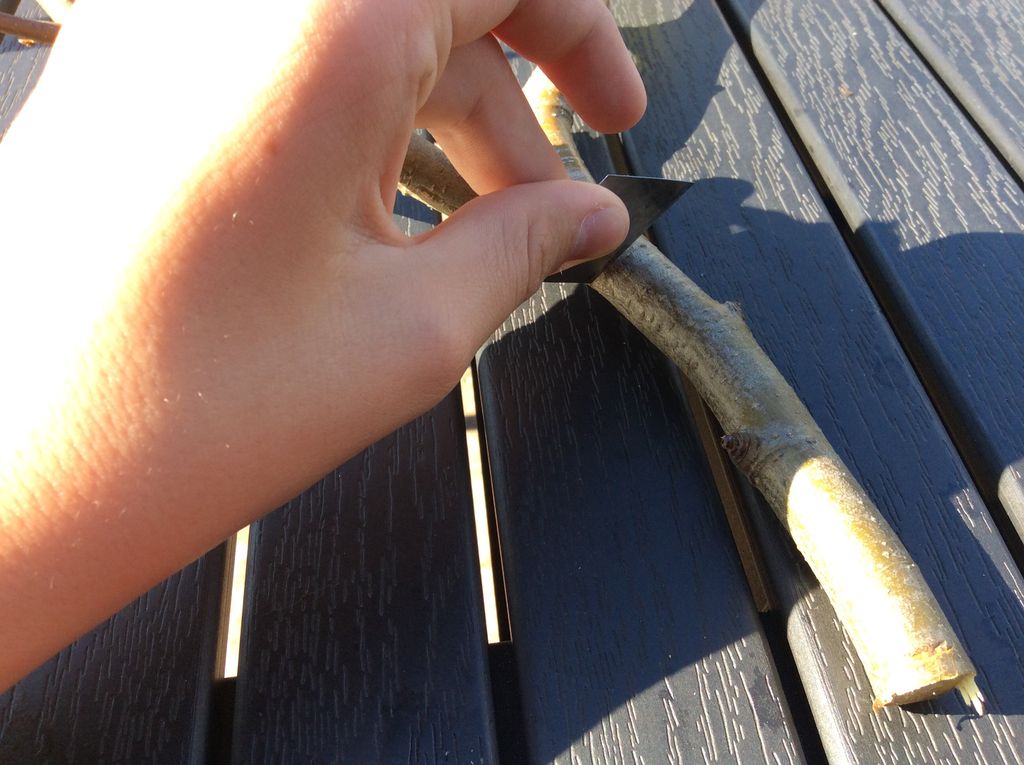
Preparing the Handle

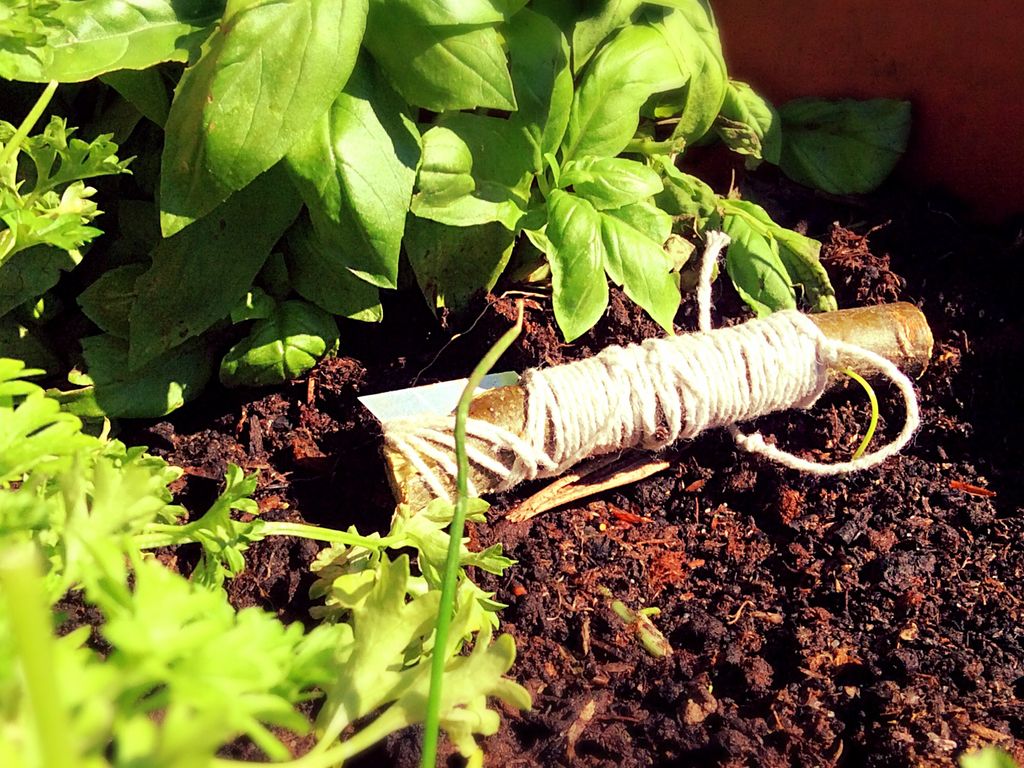
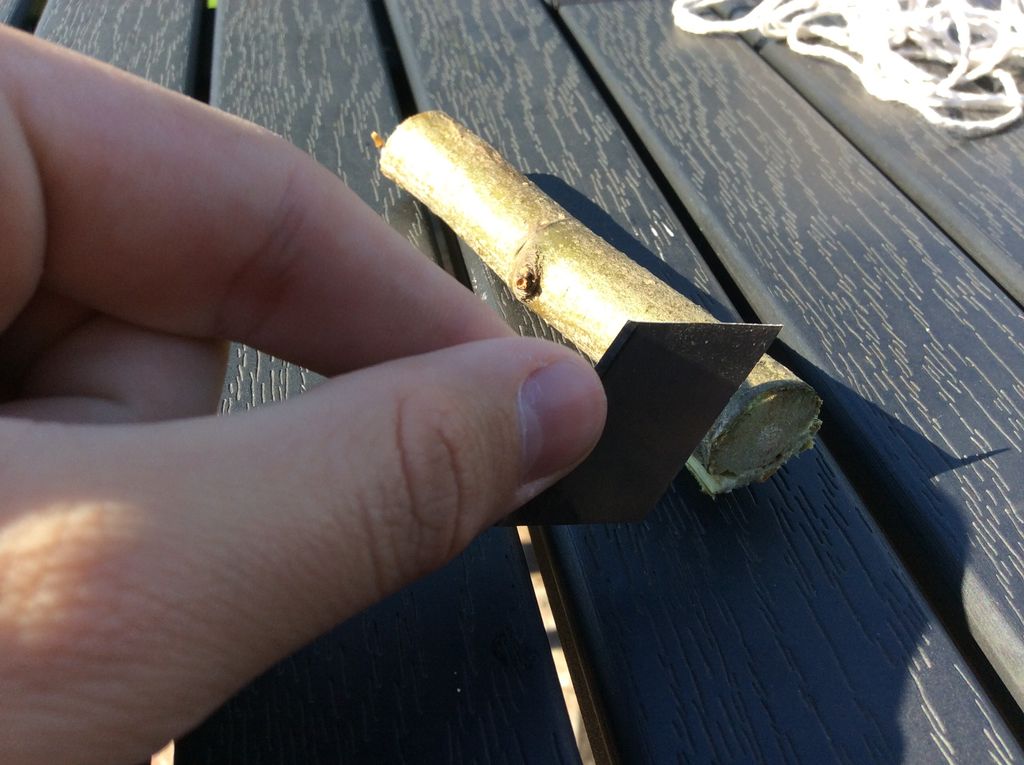
The next step is to take your knife or box cutter and cut a gash near the far end of the handle. You want the gash to be just deep enough to seat the edge of the dull side of the blade without causing the holes to be completely recessed into the wood. You can also situate the blade so that it is seated a few millimeters inside of the edge of the handle, or make it so the blade can slide out from the end. Keep in mind that if you let it slide out from the end, it will be easier to make the knife, but the blade may end being less-secure. Experiment with both options to see the difference, and choose the method that works best for you.
![]()
Installing the Blade
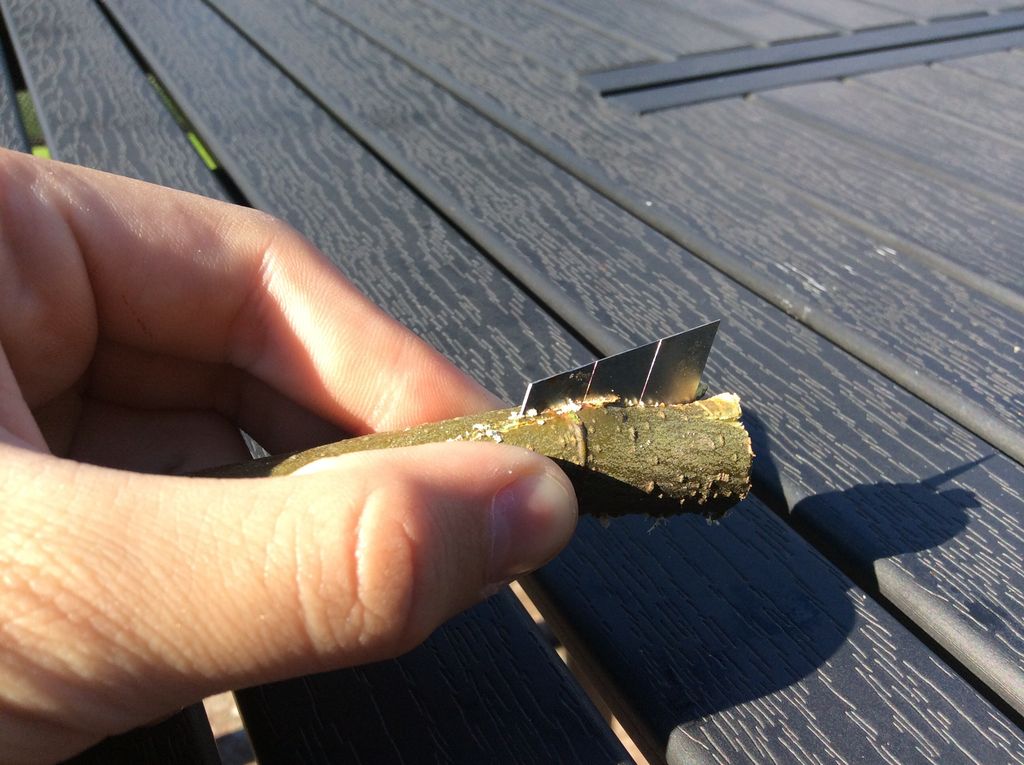
Once the gash has been made, carefully insert the blade (sharp side out) while wearing gloves.

Next, take your wire or cordage and tightly wrap it around the handle and through the exposed holes. Pull tight to secure in place. You can either make a couple of loops for each hole, or weave the cordage or wire along the end of the handle and through all of the holes as well. Some people think that doing them individually will make the connection stronger so they prefer weaving. Again, feel free to experiment and use the method that works best for you. The most important thing is that the blade is secured in place, and that any movement or wobbling is kept to a minimum.
While both disposable and standard blades will be just as sharp, remember that standard ones are wider, and this will give you more room to cut when using the knife. The disposable blades will rest closer to the surface of the handle, making it more difficult to cut through thicker materials. In any case, this simple trick can come in handy, and it’s worth practicing on a couple variations of this project in order to be ready to put one together during a crisis. Try it out for yourself, and think of ways that you can improve on this basic design in order to make the knife as practical as possible.