How to Make a Sturdy Target Holder out of PVC
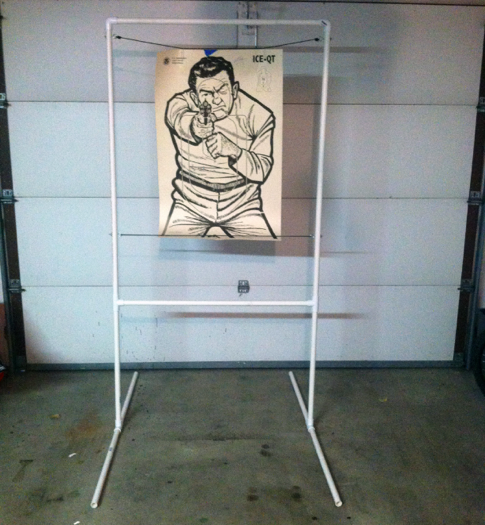
Not a lot of thought goes into target holders, but they actually play an important role in the quality of practice sessions. A good target holder will support the target while helping to keep movement to a minimum. It will also allow a target to be placed away from objects that would otherwise be damaged or destroyed as the projectile passes through the material. Let’s take a look at a simple project that will allow you to create a sturdy frame in a few easy steps.
![]()
Required Items:
3 pieces of ¾” diameter PVC that is 10 feet long
4 ¾” diameter T connectors
2 ¾” diameter elbow joints
4 ¼” eye screws and nuts
4 binder clips
About 10 feet of cordage
![]()
Getting Started

The first step is to cut the PVC pieces to size. For this project, you will need two 4′ long segments, 2 3′ long ones and 6 that are 2′ long. Sand down the edges to make them easier to connect and set aside. The next step is to drill a series of holes for the eye screws and cordage. The trick is to place the holes in the location that will best accommodate the targets that you use.
You want to put the top holes a couple of inches from the top of the 4′ segments, which will serve as the top portion of the frame later. You also want to drill some holes to hold the target at the bottom as well, which will be near the bottom of the 4′ segments as well. However, it’s a good idea to drill a series of holes so that you can adjust the cordage and eye screws as needed for greater flexibility.
![]()
Assembling the Frame
Once everything has been prepped, we can start to build the frame, and the process is pretty simple. Start by making the legs. Take 2 pieces of the 2′ long segments and connect them with a T connector. Repeat for the other leg, and make sure that the T connectors are facing up. Next, take another 2′ segment and attach it to the upward facing T connector on each leg. Then, attach another T connector to the top of the vertical segment. Make sure that the T is facing inward on both sides. Connect one of the 3′ long segments to the horizontal inward T connectors to join the legs together at the top.
The next step is to take each 4′ long segment and attach it to the other end of the T connectors on either side of the frame you just made. Make sure that you insert the segments so the holes you drilled for the top of the target are near the top of the frame. Next, attach the two elbow joints to the top of each 4′ long segment before connecting them with the remaining 3′ long piece. This completes the frame, and all you need to consider is whether or not to glue the joints together or keep them free so the unit can be disassembled. You can also glue some sections while leaving others loose as well. Feel free to experiment with the configuration that works best for you.
![]()
Attaching the Cordage
The final step is to attach the eye screws and bolts to the frame. Start by placing them through the top holes, one on each side, and secure them in place. Do the same thing with the bottom holes. You can also add more eye screws in order to have them in place so you don’t have to move the original ones if you want to adjust the target size later. You can also use some concave washers on either side of the screw holes in order to make the fitting more secure if you like as well.
All you need to do now is attach the cordage. Ideally, you want the cordage to be a little flexible on top and taut on the bottom. Cut the cordage into sections accordingly, and feel free to experiment as desired. Finally, you may want to consider attaching some end caps to the ends of the leg sections in order to provide the stand with a little more “grip”, but this is optional. When you’re ready to attach the target, simply use the binder clips to connect the material to the cordage.
One of the nice benefits associated with this design is that you can use the stand for other purposes as well. Try this project out for yourself, and see how this stand can give you a lot of flexibility when it comes to being able to set up a practice range in different locations.