How to Make a Rocket Stove From Duct Pipe

There are a lot of different ways to make rocket stoves, and the more projects that you become familiar with will give you more options to incorporate into your preparedness efforts. One nice project involves using a paint can along with some aluminum duct pipe that can normally be found around heating and air conditioning systems. Take a look at the steps below, and see how easy it is to create an efficient rocket stove with these basic items.
![]()
Required Items:
1 clean gallon paint can
1 foot long piece of duct pipe that is 2-3” in diameter
1 90 degree aluminum elbow joint that is also 2-3” in diameter
1 bag of clay-based cat litter
Hammer
5/16 or ¼ inch drill bit
Drill
Tin Snips
![]()
Getting Started
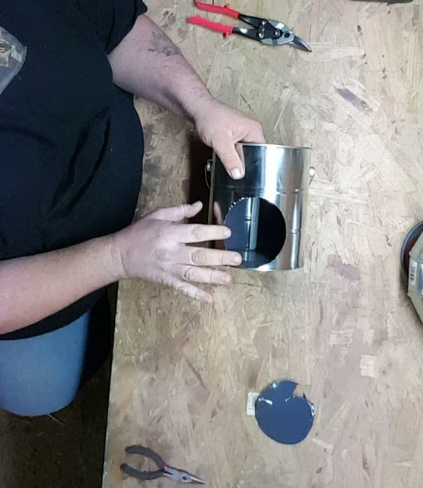
The first step is to trace out one of the ends of the elbow joint on a piece of paper. Cut out this circle and place along one of the sides of the paint can about ½ inch from the bottom. Trace the outline of the circle around the can with a sharpie. The next step is to cut out the hole with your snips or good pair of shears. It’s easier to start cutting sections away from the center of the hole until you get near the edges in order to make a good cut all around. Making a pilot hole with the drill bit will make this process much easier. Once cut, remove the piece and discard. File or smooth down the edges of the hole you just made to avoid getting injured by any shards of metal later on.
The next step is to insert the elbow joint into the hole and positioning it so that it faces up inside of the can. Try to leave about an inch of the other end of the elbow sticking out of the side of the can after its seated. Remove the joint and make any necessary adjustments to the hole in order to provide for a snug fit.
Take the elbow joint and place it over the center of the lid of the paint can. Trace the outline with your sharpie and cut out this hole before smoothing down the edges as well. Next, cut off two inches from the bottom of the long piece of duct pipe.
![]()
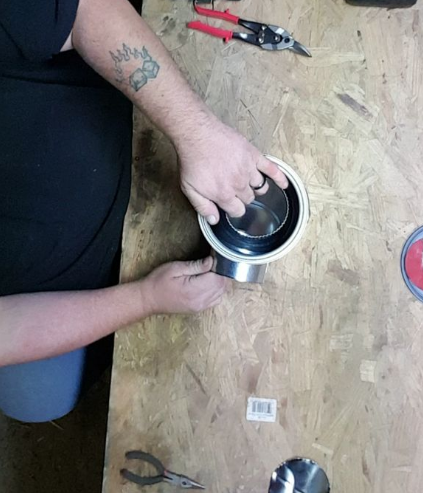
Assembling the Stove
Insert the elbow joint into position and attach the 2” piece of pipe you just cut to the top of lid. Secure it so that the pipe extends down through the hole, and make it as flush against the lid as possible. It’s not necessary for the elbow joint to connect to the pipe and lid, however it can make the unit more efficient. If you want these pieces to be connected, you may need to adjust the length of the segment to be longer than 2 inches.
Once the elbow joint has been installed, pour the cat litter the spaces between the joint and the walls of the can. This will provide a nice layer of insulation that may cause the unit to retain more heat, and this can help to conserve a lot of fuel as you are using the stove.
The last step is to create a platform out of the remaining pipe that will be inserted through the bottom end of the elbow joint. This will be where you insert and hold the fuel as you use the stove. Connect the pipe to the joint and decide how far you need the pipe to stick out in order to hold the fuel. Trim the pipe as necessary and you’re good to go. There is a lot of room for improvisation when it comes to fashioning the platform. You can cut a section of the top of the pipe off and fold it in to create a flat surface, or you can also make a table that can slide through the center in order to maximize air flow beneath the fuel as well. Tinker around with this segment in order to discover the most efficient way to use this stove.
Whether or not you do anything with the pipe, you can still end up with a sturdy and efficient rocket stove that should support a medium-sized skillet. Try this project out for yourself, and see how some extra duct material and a paint can be fashioned into a valuable resource during a survival situation.